Forecasting With Millennium's Budget Module
Forecasting is a planning tool that projects estimates of future expenditures based on current and past data along with analysis of trends.
The forecasting module is a planning tool for items that are not built into the fiscal year budget using a budget transfer. Here are two relevant examples:
- While we currently show salaries encumbered for the entire fiscal year, we have yet to find a systematic way to show commitments for corresponding fringe benefits. Using the forecasting module, you can enter costs for these benefits (recorded as positive changes to your forecast) to show where you might have variances at the end of the year due to changes in personnel.
- Many times, commitments are made by the President to reimburse departments for one-time expenditures with funds from the contingency reserve. Transfers for these commitments are not made until after the expense has been incurred, so it may be useful for departments receiving these reimbursements to put them into the forecasting module (recorded as negative changes to your forecast).
The use of the forecasting module is not required, but it is another tool to aid departments in fiscal management and decision making.
Page Contents
Important Definitions
Millennium Budget Development: The part of the Millennium Fast budget module that allows users to build and approve new fiscal year budget entries as well as forecast current for the current fiscal year.
Class and Subclass: Budget categories that assist with tracking and reporting. Class and Subclass are optional when working in forecasting.
Development Menu: Main menu for budget development and forecasting options.
Development (“Dev”) Series: A spreadsheet type table in Millennium used for the collection of data. For example, “FY18 Forecast” is a series.
Development Entry Menu Item: Form to view present series entries, edit any “pending” entries, or add new entries. All entries in forecasting should be unlocked unless you approve them.
Forecast Menu Item: Report used to view fiscal year forecast entries. May also “quick enter” into forecasting series from this screen if your org code does not have “children.”
Status: Pending Approval (or Pending), Approved or Denied. All records are in Pending status until Approved or Denied.
Status Indicator: Pending (yellow), Approved (green), Denied (red) circles found on the Add/View/Edit Budget Entry Records screen to the left of the Dev Series column. Quick way to see items approved/pending or denied. You can approve your forecast but it is not necessary since it will not be posted to Banner.
Excel Import: Excel file template used to upload changes to Development. Found on tBO website as well as on the development entry page (bottom).
Review User Requests Menu Item: Form used by budget approvers to approve or deny pending budget changes. This form can be found under the Development menu. This is not necessary for forecasting but can be used if you so desire. Unlike the base build, none of the “approved” entries will be fed to the subledger so approving a record in forecast will only lock it to prevent it from being edited.
Setting Up a Forecast
Step 1
Log in to Millennium (or test)
Step 2
Click on Budget and Forecasting
Step 3
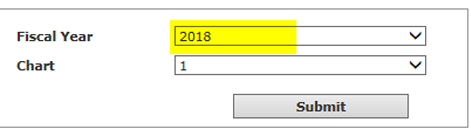
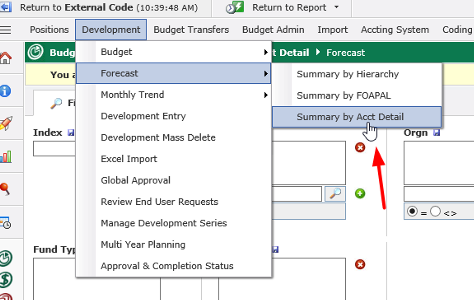
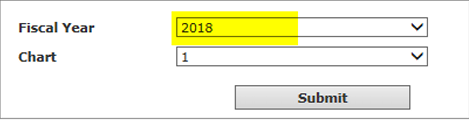
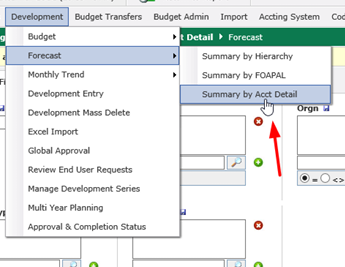
Select Fiscal Year and click Submit. For forecasting, you will select the present fiscal year. In our example, 2018. Go to the Development menu, click Forecast, and then select the report you would like to view (Summary by Acct Detail in the example below).
Step 4
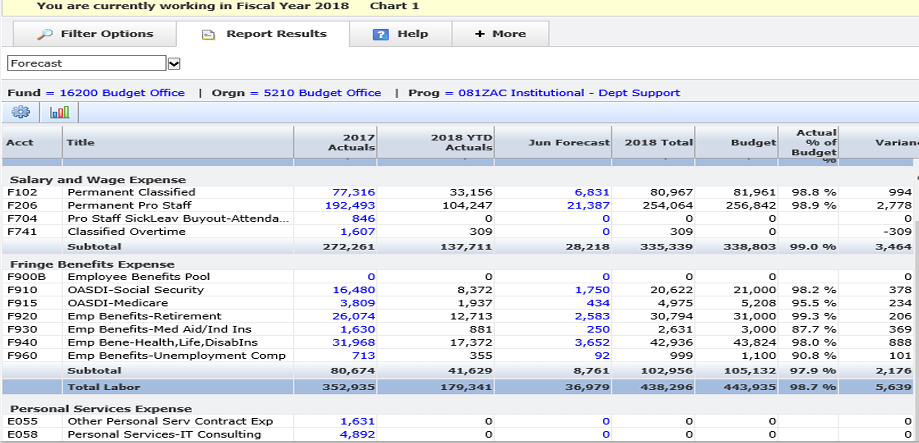
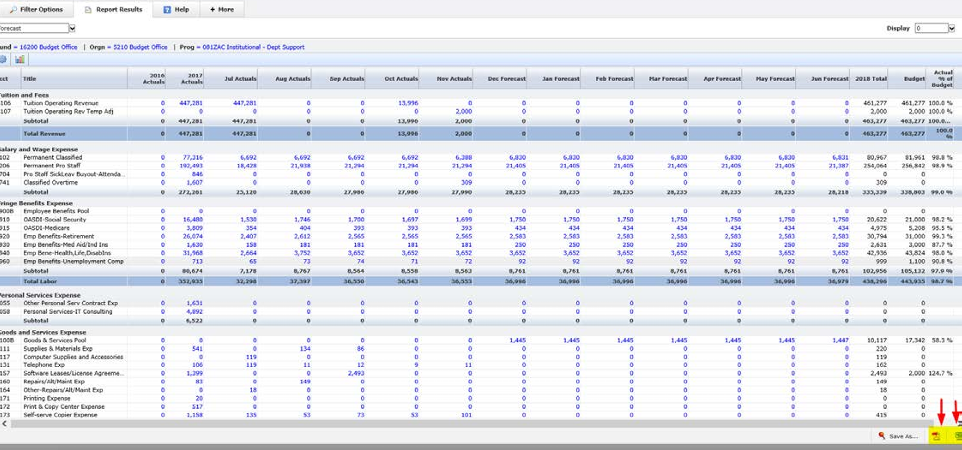
View the columns to determine set-up. Columns in the Summary by Acct Detail report (from left to right):
- Account
- Account Title
- 2 Fiscal Years Ago Actuals
- Last Fiscal Year Actuals
- YTD Actuals
- July – June (actuals displayed once the fiscal period closes, remaining are forecast columns)
- Fiscal Year] Total: This is your total forecast for the year. Actuals + Forecast for the fiscal periods not closed)
- Budget = Fiscal Year Adjusted Budget i. Actual % of Budget = percent of budget being used in the forecast
- Variance = budget dollar value minus the 2018 Total (forecast).
Step 5
Set up your forecast and save as a pinned report. There are three recommended types of forecast set-up:
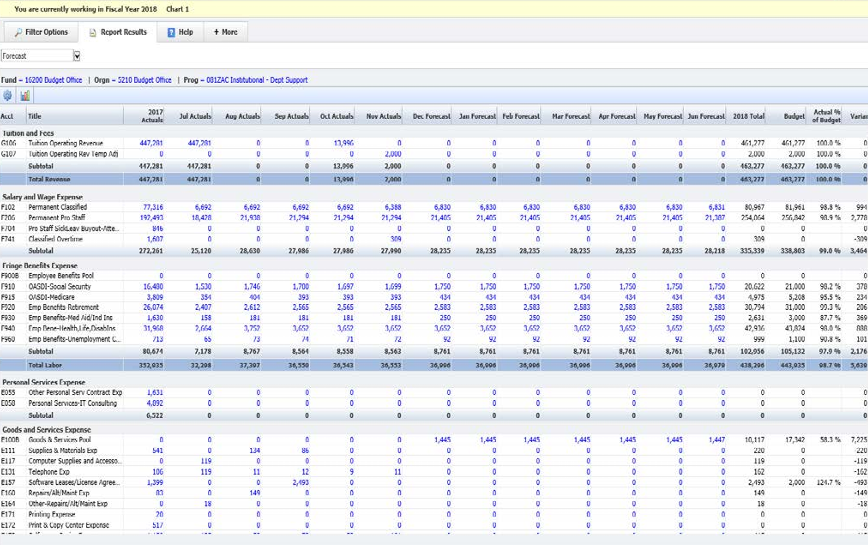
Monthly Forecast (default): 12-month view beginning in July and ending in June of the fiscal year selected upon opening the budget module. If you plan to forecast with the 12-month model, you may want to hide the YTD Actuals since you will see these actuals each month.
Screenshot of 12 mo set-up:
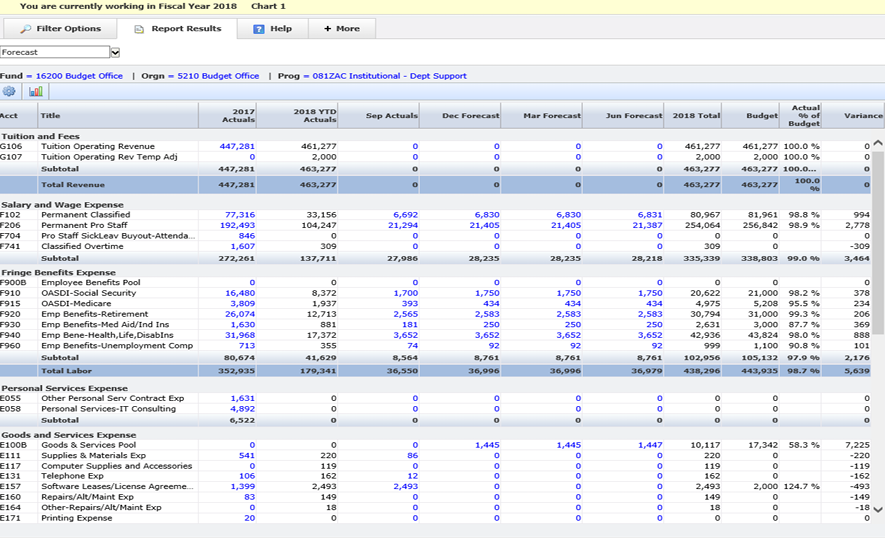
Quarterly Forecast: a forecast using 4 months of the fiscal year (ex: September, December, March, June or July, October, January, April). Columns to hide: hide months not used. If you do not want to see the actual YTD, go ahead and hide the YTD Actuals column. Please note that actuals will be calculated in the 2018 Total column at the end of the grid even if you hide the columns with the actuals in them.
Screenshot of quarterly set up:
One-Month Forecast: Use June to enter all forecasts for the fiscal year. Hide all months except June. Leave YTD Actuals column in. In this model, all estimated expenses are entered into June.
Screenshot of June only set-up:
Step 6
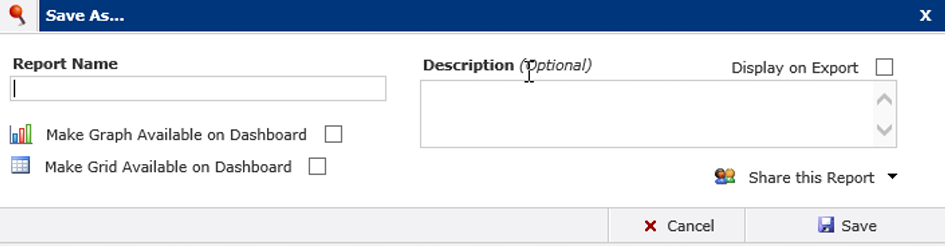
If you modify the forecast report, pin the report so that your changes will not be lost when you want to view the forecast again. You may also want to make it available on your Dashboard.

NOTE ON SET UP: Forecast defaults are 12 months with recurring beginning base budget (BD01 and BR01 rule codes) divided equally over the 12 months. If you want to forecast with fewer months, you may want to remove the totals in the months not being used (i.e. make them zero by entering a negative transaction to bring the balance to zero) and adjust the months up that you are planning to use based on your spending analysis.
How to Download Data for View or Analysis
If you would like to download your present forecast in total in order to view it in Excel or to perform calculations, you may do so directly in the Development Entry series.
Step 1
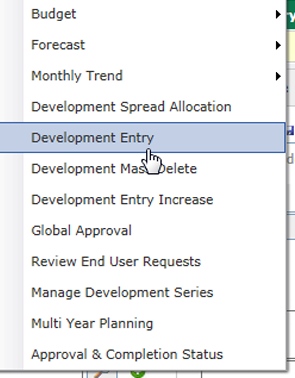
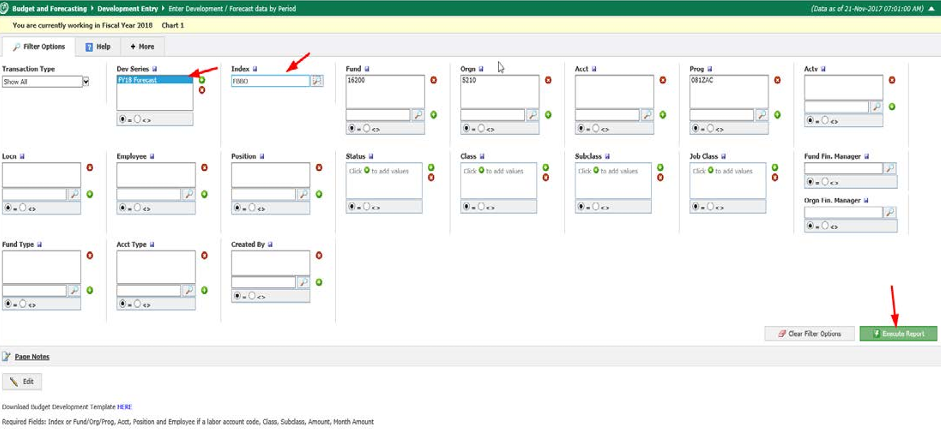
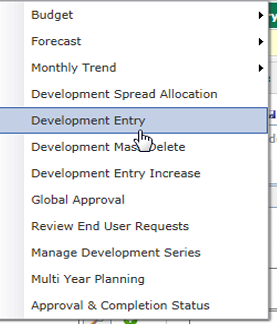
Open Millennium Budget, select the fiscal year you are building the budget for, navigate to the Development menu, and select Development Entry.
Step 2
Select the Forecast Series (ex. FY18 Forecast), select your filter criteria, and then Execute Report. The report results will be displayed.
Step 3
Click on the Excel icon at the bottom right of the screen and then select Open or Save on the pop-up box. Data will be exported to Excel.
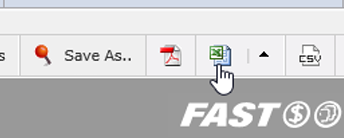

Note: You may also download the Summary by Acct Detail Forecast report itself without supporting data by clicking on the PDF or Excel icon at the bottom right of the report:
How To Upload To Millennium - Forecast Series
Step 1
Download Excel Template from Development Entry Screen or use the development template found on the tBO site.
- Prepare your data to upload.
- Do not include any formulas in the upload. If you paste from another document, paste as values so that formatting is not included.
- Required fields: Fund, Org, Acct, Prog, Amount, and Description. Enter Amount in the month or months desired. Use a negative "-" number for any budget decrease entries and a positive number for any budget increase entries.
- Optional fields: FAST (do not need to add Fund/Org/Prog if you use this), Additional Comments= your notes/comments on the transaction (equal to 255 characters).
- Save the template in preparation for upload.
Note: uploading with the template will add additional lines to the forecast similar to how the base build is compiled.
For forecasting, you may also change totals directly in the form without adding extra lines if you do not have a need to track the history of your changes.
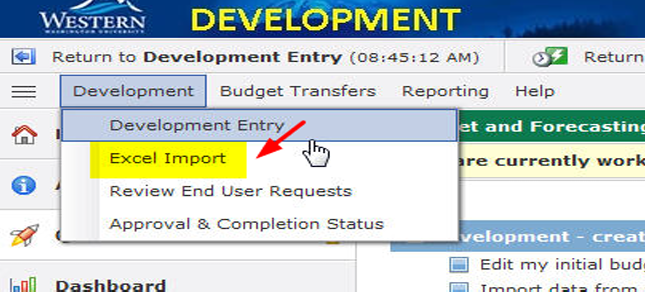
Step 2
Once you have your upload prepared, open the Millennium Budget Module, select the present fiscal year (ex. 2018), navigate to the Development menu, and select Excel Import.

Step 1
Click on Browse, navigate to your saved template, highlight the file, click open and then click Next Import Step all the way to the right.

Step 2
Select the Development series to upload the data to (ex. FY18 Forecasting) and then click on Next Import Step all the way to the right.

Step 3
Millennium will check against the chart of accounts for active chart elements and then give you a completed message. Click Ok. If there is an error, you will receive an error message and be prompted to open a PDF document that will display the lines causing the error. If there is an error, the entire upload will fail so you must correct the error and upload the document again.
Step 4
Click Ok to exit.
Step 5
Navigate to the Development Entry page to view or edit items uploaded.
Note: if you uploaded in error and would like the entire upload deleted, please contact the Budget Office with a mass delete request. Have the Excel import number handy (to the right on the Development Entry screen called “XL Import Log).
Editing and Adding Forecast Entries in Millennium Budget Development
Step 1
Log into Millennium Budget for the current fiscal year.
Step 2
There are two ways to enter your forecast: data-grid entry and quick entry. To enter via data grid
- Click on the Development menu and then Development Entry. Selecting Development Entry will take you to the starting point to edit and add entries to your budget.
- Select the Dev Series (ex. FY18 Forecast) and any other filters you would like and then Execute Report. The report results will be displayed. Note that you will not see actuals in this screen – just the forecast totals. From here you can enter new lines, edit current entries, attach documents to entries, etc. Each row has a circle status indicator to the left of the Dev Series column. If a record has been approved the circle is green and the record is not editable. If the circle is red, the entry has been denied. If the circle is yellow, the entry is in pending status and can be edited or deleted.
- To edit a pending entry (yellow circle all the way to the left), click on any of the editable fields (ex. Acct, Emp %, Amount, etc., and enter the change) and then click Save - little disc next to the +New button. Note: once you change a record, the original data will be overwritten with the new data. Only the person who has added or uploaded the line can edit the record. However, anyone can add a new line to make an adjustment for the same FOAPAL/Employee string.
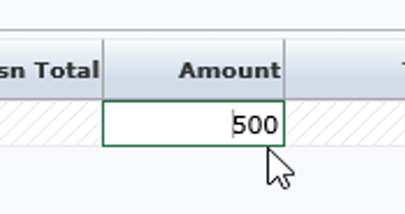

Click field to change data and then save to update a record
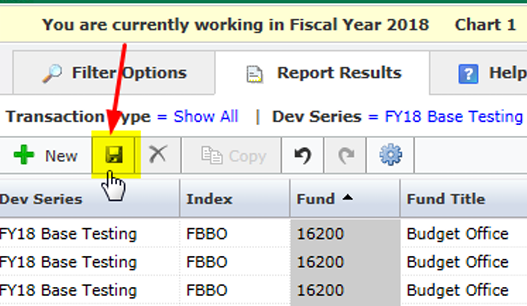
Save = disc button. You may save after each change or make multiple updates and/or add lines and then save before exiting.
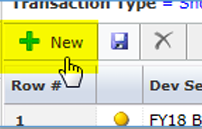
- To add a new line, click the +New icon at the top left of the Development Entry Screen the screen or, if you are at the end of a row and tab, a new line will appear. Enter all info for new line and save.
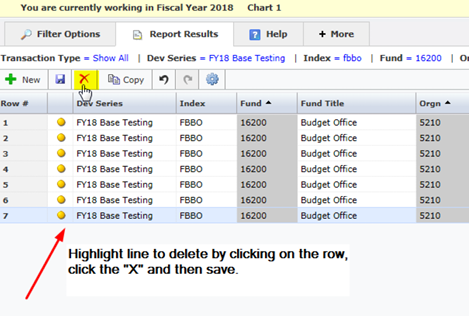
- To delete a line from the main development screen, highlight the row you’d like to delete, and then click the red X in the upper left corner of the screen. Note: Save changes or delete will not occur.
Step 3
To quick enter forecast data directly in the forecast report:
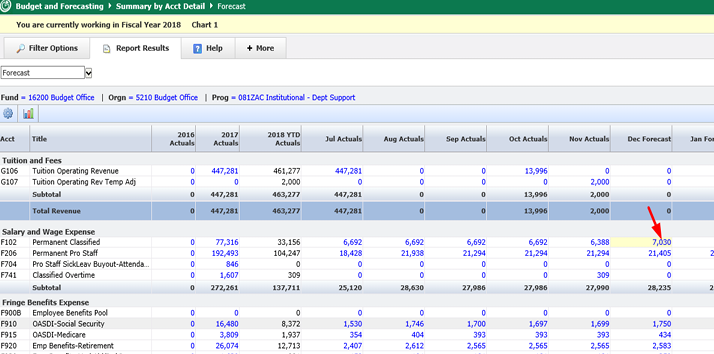
- Click on the Development menu, then Forecast, then Summary by Acct Detail.
- Enter FY18 Forecast as series, set your filter criteria and Execute Report.
- When the report loads, click on any of the blue highlighted totals in a month that is labeled forecast. Note that if you click a month labeled actuals that the link will take you to the finance actuals associated with the total.

- The quick entry box will open. Required fields: forecast dollars being increased or decreased, Prog code, and comments.
- Enter your change amount (up or down) and the new total for the line will be calculated once you tab out of the box.
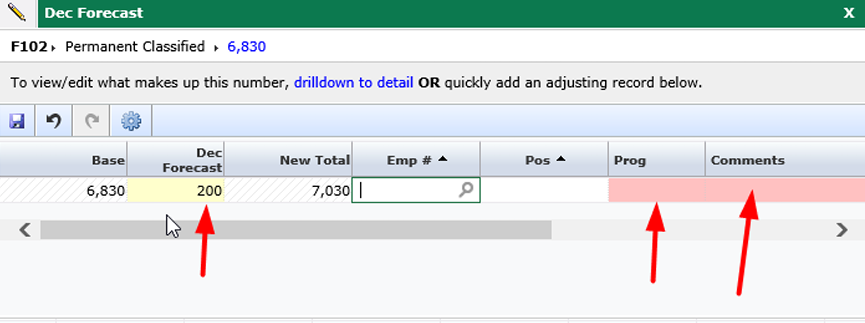
- Save the record with the save disc icon at the top of the box. Once saved, the new forecast total will appear on the report and be included in all calculations. If you click the number again and drill down to detail, you will see the comments, etc., that you included with the change. You may also attach documents to the entry on this datagrid detail screen.
Datagrid detail screen – add attachments to forecast entry by clicking the paperclip:
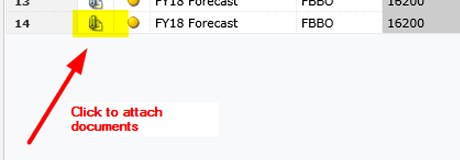
Important note: if your org code has “children,” you will not be able to use the quick entry box. When you click on the forecast amount, it will automatically route you to the development datagrid entry screen instead of the quick menu.
General Information on Millennium Forecasting
- At the close of each fiscal period, the budget office will archive the forecast and then load the actuals for the closed period. An email will be sent to everyone with forecasting permissions to let users know the series has been updated with actuals.
- When actuals are loaded, the totals replace the forecast total for the month in the forecast report. For example, when November closes, that column changes from a forecast column to an actual column and represents actual expenses posted to Banner’s general ledger.
- When you drill down to the datagrid entry, you will still see Jul through June represented (or any months you have chosen not to hide) but any numbers you see for closed months will not be shown or calculated on the report. In addition, if you make a change to a closed period, you will not see that change represented on the forecast report.
- Prog code is required for quick entry because we do not use a 1:1 relationship with fund-org-prog at WWU.
- Class, Subclass, Posn #, and ID are not required in forecasting but can be used if you would like. If you require more Class/Subclass codes, please contact the Budget Office.
- If you would like to post to the forecasting series at the same time you’re performing a budget transfer, you may do so by selecting the forecast series in the header of the budget transfer. More information can be found in the budget transfer guide.
- You can be as detailed or as general with your forecast as you’d like but just remember that it’s only as accurate as you choose to make it with the data entry you do. Forecast totals are not automatically updated and must be manually maintained. In addition, any open commitments in Banner must be manually entered and maintained in the forecast.
- Use caution when performing data entry or approving records. There is one forecast series for the University and since we do not have org security turned on, this can cause errors with data entry and approvals. Be sure to select only your FOAPAL records to change or approve.
Appendix - Scenarios (recommended entry)
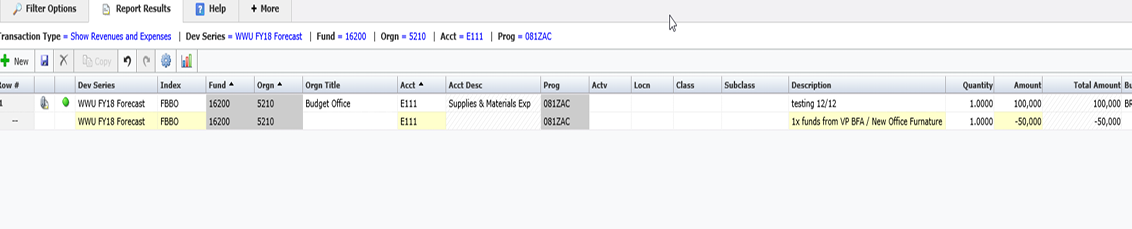
Scenario A: Commitment to be reimbursed with an accounting JV or budget transfer
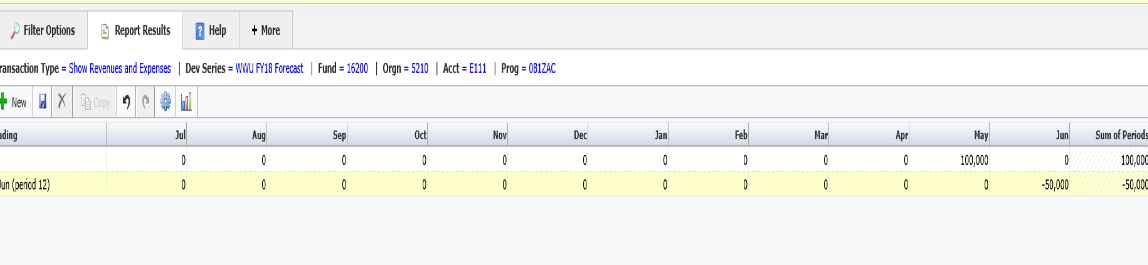
- If you are the receiving department, enter the commitment as a negative dollar amount along with any supporting documentation into your forecast for the month you expect to receive the funds. If you are not sure, enter the commitment into June.
- If you are the department funding the commitment, enter the commitment as a positive dollar amount in your funding string.
- If you are doing general forecasting by account code (i.e. overwriting a total and not creating a new line) – increase or decrease the present forecast amount in the account code by the commitment amount.
- If the commitment is to be an expense reimbursement via an accounting JV, once the commitment posts and the forecast series is updated with actuals, you will see the actual reimbursement replace the forecast. If the commitment posts in the month you designated, no further action is required.
- If you entered the commitment into a future forecast month and had expenses reimbursed before the month you selected, remember to zero out the forecast total for the line you entered for the commitment. If you don’t, your “Actual % of Budget” and “Variance” columns will be incorrect. You can wait until actuals replace the forecast but just be aware the totals will be incorrect.
- Similarly, budget transfers are reflected immediately on the forecast report so once the budget transfer occurs for the commitment, zero out the forecast total to ensure that the summary columns are correct. You may wait until actuals replace the forecast but totals will be incorrect until then.
- Note: you can either add a new line for your entry or overwrite the existing total with a new amount – depending on how detailed you’d like to be with tracking.
Scenario A: Example of expense reimbursement or budget commitment forecast entry (adding a new line):
Scenario B: New employee in a new position
- Divide the employee’s annual salary by 12 to calculate monthly salary. Enter that total in each remaining forecast month OR multiply that total by the remaining months in the quarter(s) or fiscal year depending on your model.
- If entering a new line, add position number and employee ID to the line and then the individual salary total from the step above. If doing general forecasting based on account code only, increase the total in the account code by the amount for the new employee for the months in your model.
- The months that the employee did not work should be zeros (or no increase) in your forecast. Actuals and forecast will begin from hire month.
- Don’t forget to increase the benefit pool/benefit account codes beginning the month the employee was hired.
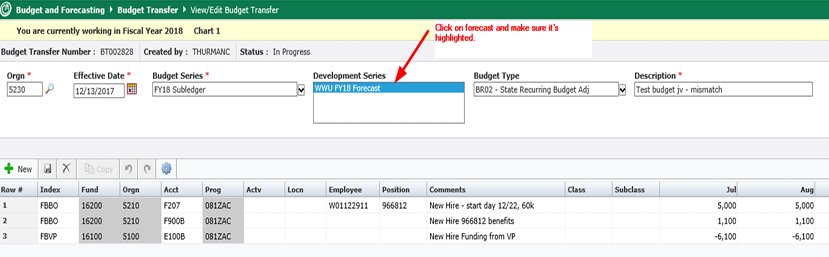
- If you’re forecasting by adding new lines to your forecast, you can automatically transfer the lines to your forecast when doing the budget transfer to fund the position (see example below). You may enter quarter totals, 1x a year totals or monthly totals for the budget transfer and have it simultaneously post to forecast. You may budget the entire year on a recurring basis with your budget transfer and the closed months will not be added to the forecast report. Note: you may see them when you drill down but they will not be in the report calculations as the report will only calculate the actuals plus the remaining forecast months.
Scenario B: Example of New employee in new position simultaneous budget transfer / forecast post
Scenario C: New employee replacing an employee in same position, same fiscal year
- Make all forecast months zero for employee who is leaving based on their end date. For example, if the active forecast month is October and the employee is leaving in December, leave salary in for October and November and then make December – June all zeros.
- Add a new line for new employee.
- Calculate new employee salary same as in Scenario B and add to forecast months based on hire date. Same as above, months not worked should be zero. If active forecast month is October and employee is starting December 1st and makes $60,000, $5,000 per month for December – June should be added to the forecast ($35,000 for the year).
Scenario C: Example of New employee replacing an employee is same position, same fiscal year

Scenario D: General Forecasting
- Your recurring, beginning base budget for the fiscal year has been spread over 12 months to start the forecast.
- Adjust your forecast as needed by increasing or decreasing totals to more accurately reflect the months where salaries, benefits, goods & services will be expended. For example, you may want to adjust any cyclic employee salaries and benefits to the months they are working. Or move the entries to a quarterly model. If you are making significant changes to the starting entries, it’s best done with an upload to make all present entries zero and then add the dollars back in where you’d like them.
- Increase or reduce expenses as needed and add anything that has been encumbered in Banner that you would like to see on the forecast report. For example, if you have an encumbrance for travel, the encumbrance will not show up on the forecast report unless you add it as an entry to an open forecast month.