Millennium Budget Transfer Instruction Guide
Follow the steps below to complete a budget transfer in the Millennium Fast Budget Module. Budget transfers are typically competed by division budget officers and their proxies. For further assistance, please contact smb@wwu.edu.
Budget Transfer Steps
Step 1
Log in to Millennium (Or Millennium development for testing).
Step 2
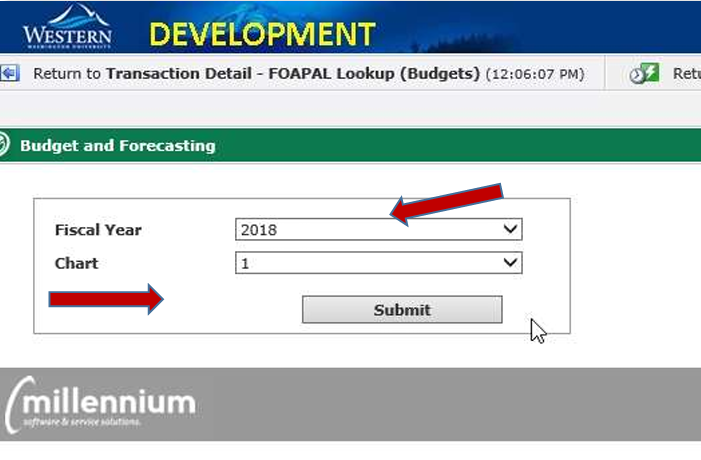
Click on Budget Forecasting.
Step 3
Select Fiscal Year from the drop down menu and click Submit.
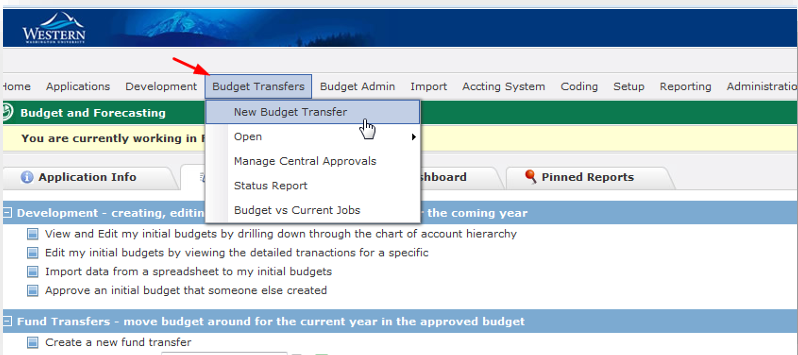
Step 4
Once the application launches, select Budget Transfers in the top menu and then click New Budget Transfer to initiate a budget transfer.
Step 5
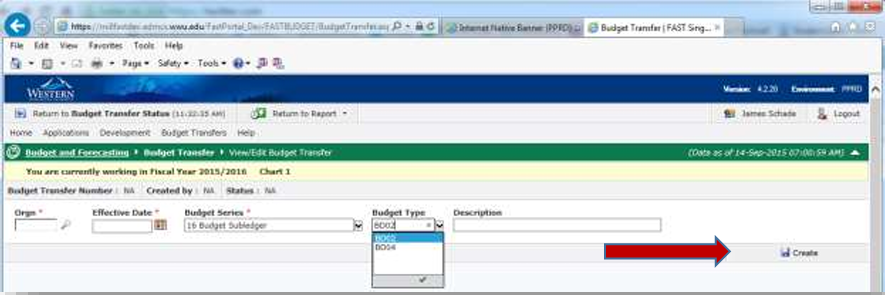
Enter
- Orgn
- Effective Date: all effective dates must be in the present month at the time of final approval and posting. For accrual period transactions, enter June 30th for the effective date.
- Budget Series: use the default FY “Subledger.” For example, if you are performing a transfer in FY18, use “FY18 Subledger”
- Development Series: leave blank unless you are forecasting
- Budget Type
- BR02 = state funds recurring change/permanent
- BR04 = state funds non-recurring change/temporary
- BD02 = self-sustaining funds recurring change
- BD04 = self-sustaining non-recurring change
- BD06 = fund balance budget in all funds)
- Description
Then click Create to the right under the entry fields.
To simultaneously post to a development series/forecast when you post a budget transfer to Banner, select the Development Series in the header when setting up the transfer. If you do not have permission to view development, you will not see anything to select in the box. However, your budget officer can choose to select it when they perform the final approval. Make sure the series is highlighted blue when you click Create. If you are adding this during approval or forgot to select it when you created the header, select the series and then click Save Header.
Note: to unselect a series, hold the <CTRL> key down while you click on the title with your mouse

Step 6
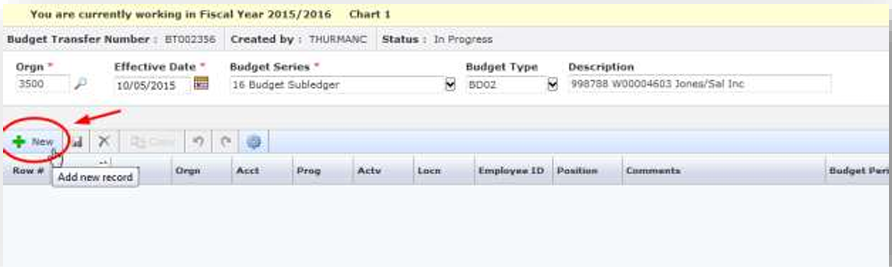
Create your entries by clicking on +New in the upper left corner under the header.
Enter:
- Index
- Fund
- Orgn
- Acct
- Prog
- Actv
- Loc
- Employee ID: required for all position transfers. For pooled positions, enter “POOLED” for Employee ID. For vacant positions, enter “VACANT” for Employee ID.
- Position: required for all position and benefit transfers
- Comment
- Amount: no cents allowed. To increase a budget, enter the number without a (-) sign. To decrease budget, enter the number with a minus (-) sign.
Continue adding lines as needed by clicking +New.
Step 7
To save your transfer lines click on the disk icon next to +New button. Once you click save, you will be able to see budget balance totals using the Balance feature at the bottom of the page.
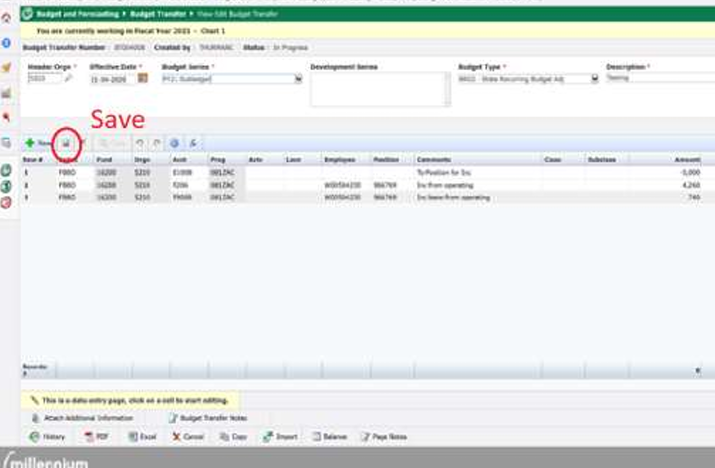
If you desire, click Balance after saving to see the total before and after your proposed budget transfer.
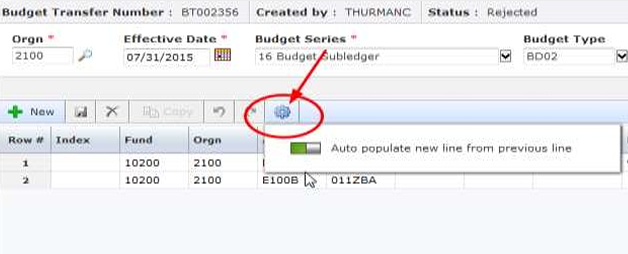
Data entry tip: If you would like to set the transfer form to auto populate from the previous line, click on the gear next to the forward button and move the bar to the right until you see green. If you use Fast Indexes, you may want to leave this feature off.
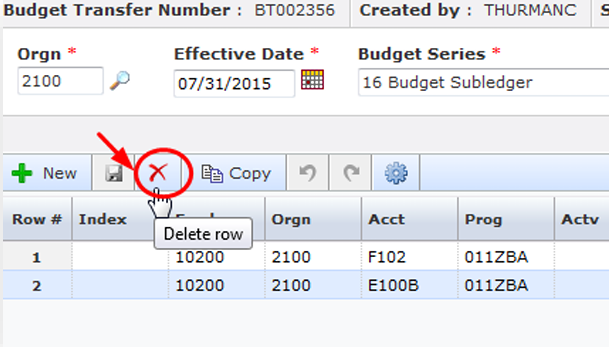
Step 8
To delete a row you’ve entered, click on the row and then click the red X next to the save button.
Note: Click save after delete.
Step 9
If you would like to add an attachment to your transfer, you may do so here by clicking on the Attach Additional Information paperclip icon on the bottom left of the page.
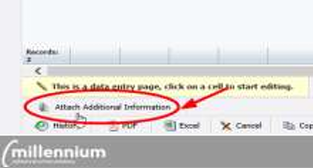
Note on attachments: we request that you use attachments judiciously and attach files that are as small as possible and contain only the information relevant to the transfer.
Step 10
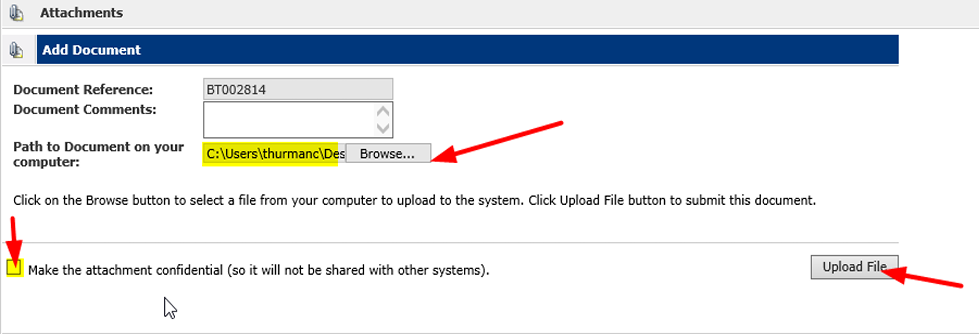
When the attachment dialogue box opens, enter any document comments necessary and then click Browse… to locate the document on your computer, select the document and click Open. You will see the document path populate below the comments box. If you would prefer that the document not be shared with other systems (i.e. finance), please click the box that says “Make the attachment confidential” and then click on Upload File.
Note: if you forgot to attach a file OR you need to attach an additional file and the transfer has already been routed and/or approved, you may do so in the Status Report Screen (see step #20 below).
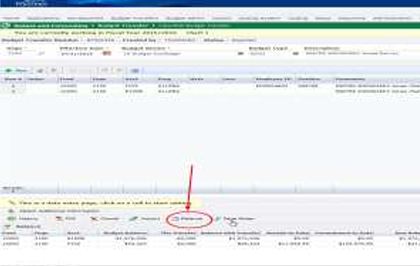
Step 11
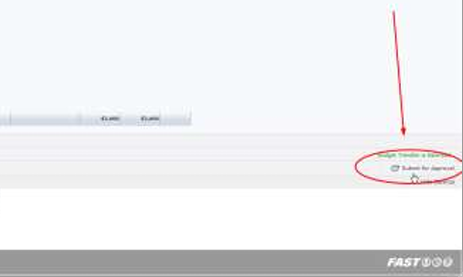
Once you have saved your work and uploaded any attachments, you are ready to submit the transfer for approval. The Submit for Approval button is at the bottom right-hand side of the screen.
Note: save all lines before clicking on Submit for Approval. Unsaved lines are not to be forwarded for approval.
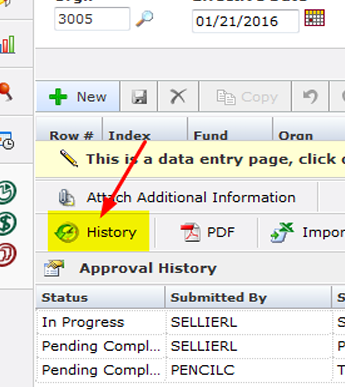
You may also view the approval history before submitting by clicking on the History tab at the bottom left of the transfer screen.
Step 12
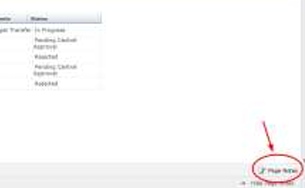
Approval routing: follow your Division’s routing instructions found under Page Notes at the bottom of the Approval screen. Click on Page Notes to see the notes.
Step 13
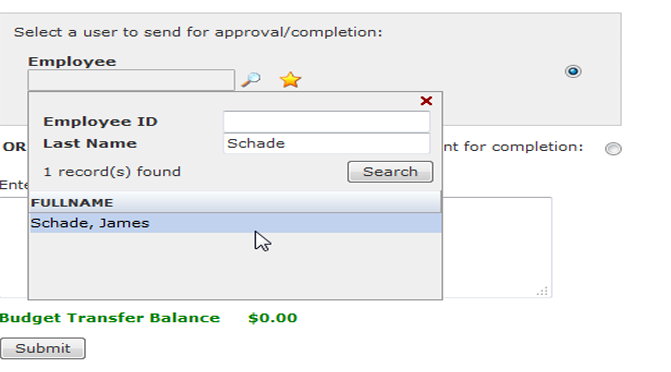
To route the transfer, click on the magnifying glass to search for approvers by Last Name or Employee ID. Once the list loads, select an approver by clicking on the individual’s name.
Tip: If this is someone you will often send transfers to, you may add as a favorite by clicking the yellow star next to the magnifying glass.
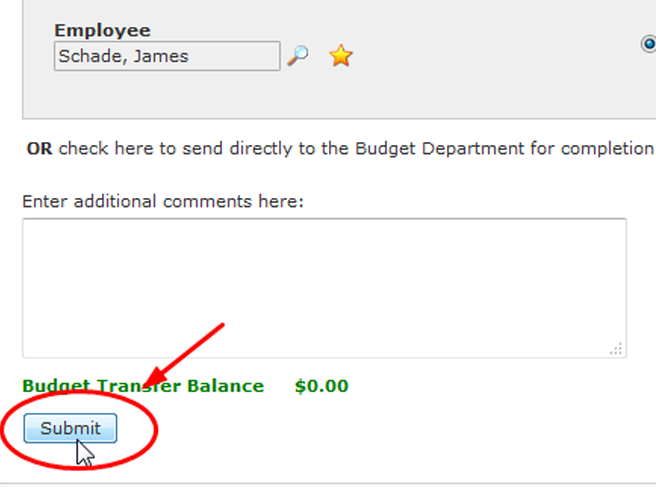
Step 14
Add any comments needed in the “Enter additional comments here” box and then click Submit to send the transfer to the approver.
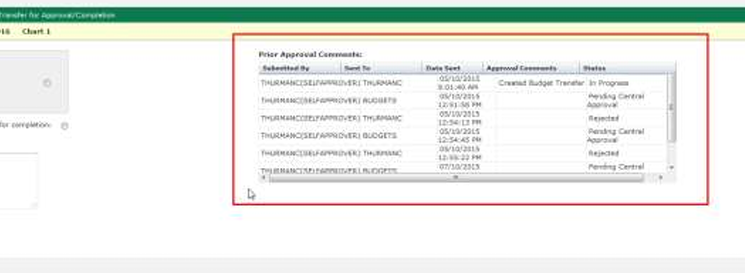
Step 15
You can see the approval/routing history for the transfer on the right hand side of the approval page.
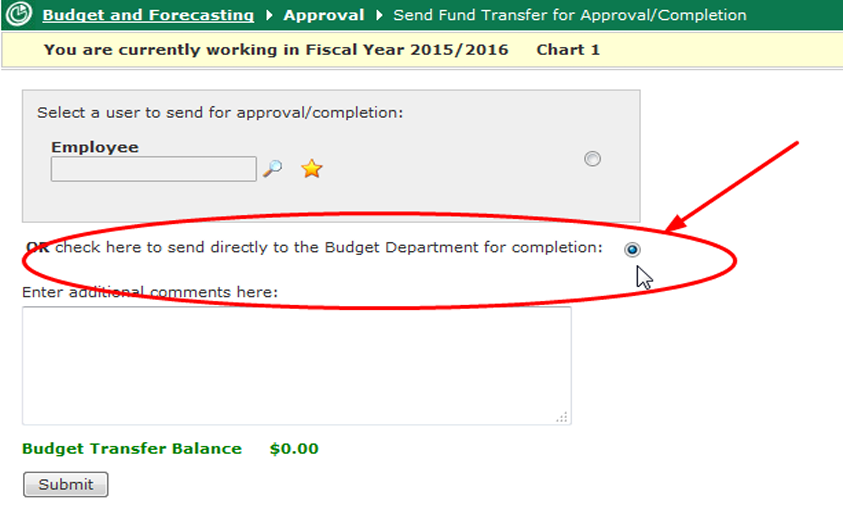
Step 16
If you are the last approver prior to budget office completion, please select “OR check here to send directly to the Budget Department for completion” under the gray approver box and then click Submit.
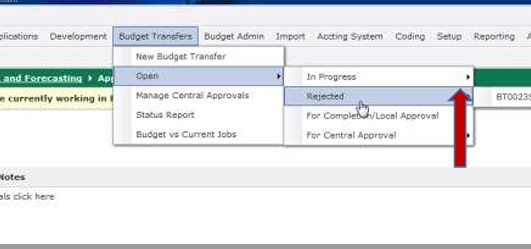
Step 17
If an approver rejects the transfer you submitted, you will be notified via email and can go to the Budget Transfers menu to select the Rejected transfer and make any changes necessary before resubmitting. Go to Budget Transfers, Open, and Rejected, and then select the rejected transfer to make changes and resubmit. If the Budget Office rejects a transfer, a note will be made in the comments as to why it was returned.
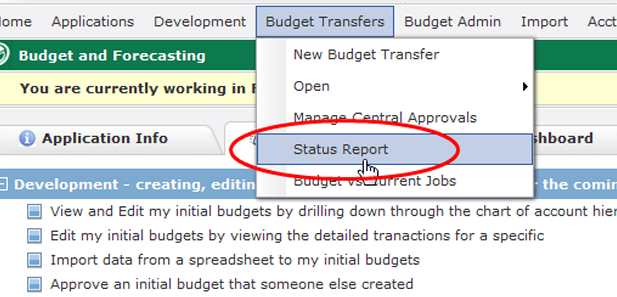
Step 18
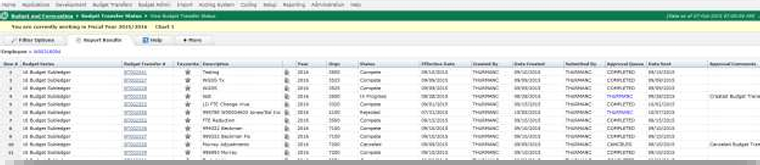
To see a list of all budget transfers and their statuses, go to Budget Transfers on the main menu and then select Status Report.
Step 19
Select report options and click on Execute Report.
Note: to see all transfers you’ve initiated, enter your Employee ID and leave all other fields blank.
Report Sample:
Step 20
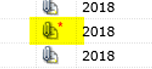
To view a file attachment in the Status Report screen, select the paperclip associated with the transfer line. Any paperclip with a red star to the right indicates there is a file attached.
Step 21
If you would like to attach a file to the transfer here, click on the paperclip associated with the transfer line, click Browse…, navigate to the file, select the file, and then click Open. You will see the file path appear in the box to the left. Add any comments, select sharing option and then click Upload File.

Step 22
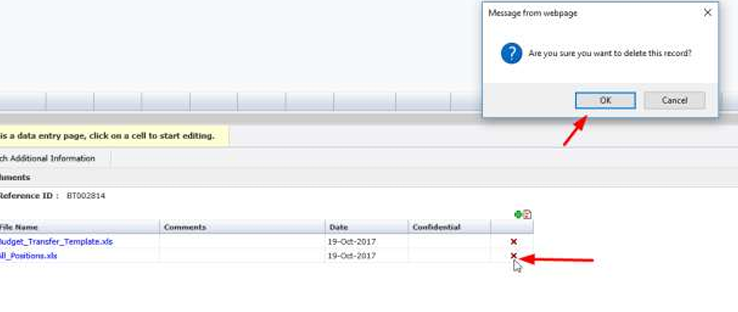
If you would like to delete an attached file associated with a transfer, click on the paperclip associated with the transfer and attachment, click the red X next to the file you’d like to delete and say yes to the delete warning.
Budget Transfer Steps Using Upload
Step 1
Prepare upload excel transfer and save to a location on your computer.
Step 2
Follow steps 1-5 above for transfers.
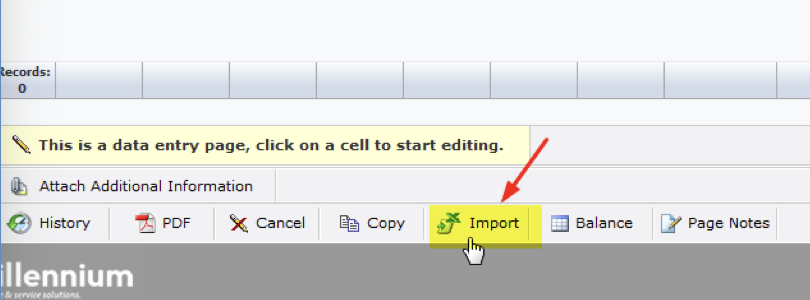
Step 3
Once your header is created, click on Import at the bottom of the transfer screen.
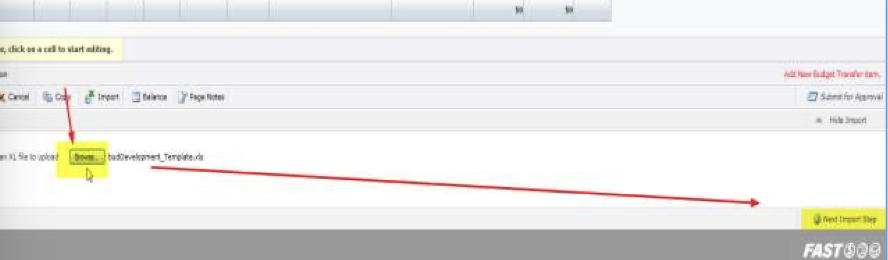
Step 4
Click on Browse, navigate to and select the excel sheet you saved, and then click on Next Import Step (bottom right) to begin the upload process. The system will analyze your upload for chart of account compliance and then, if all codes are valid, the lines from the excel sheet will be loaded into the transfer screen.
Step 5
If there is an error in a FOAPAL code or other data, the transfer system will generate an error report. Fix the error on the excel upload and repeat the upload (steps 3 and 4). The error will be highlighted in pink.

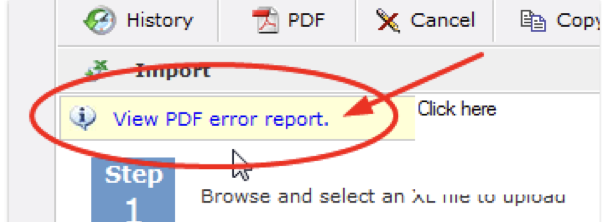
Error Report Example

Step 6
After upload is complete, submit for approval (steps 9-15 above).
***FTE NOTE: We will be adjusting permanent budget FTE only. Please contact us at budget.office@wwu.edu with the position number and the new budgeted FTE and we will make the change in the budget module**